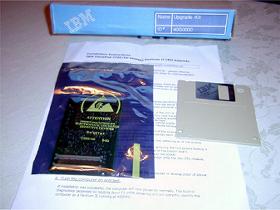
IBMが770E/EDのオプションとして提供しているMMC-1
のCPUです。
IBMってすごいメーカだと思ったのがこの400MHz CPU Upgrade Kit。ThinkPad770E/E用でそれ用のBIOSアップデートFDをセットにしキットとして発売しマニュアルには換装手順が載っています。決して簡単とは言いがたい770のCPU換装をユーザーに任せるかのようなオプション品ではないですか。
オプション品ということはこの部品に交換していてもメーカーとしてはその動作を保証してくれるわけだしこのIBMブランドのCPUには意味があるように思います。
現在わたしのEDへ改造した1AJには366MHzのMMC-1が載っておりDVDも拡張VIDEOアダプターのお世話にならずDVDEXPRESSが稼動します。
ベンチマークでも770X 400MHzと同等。もしこれに交換すれば間違いなく770X 400の上を行くマシン。
Pen2 MMC1最速ですしいろんな意味で貴重なCPU。
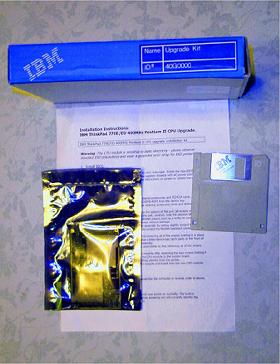
交換手順を記した解説書(1ページ)が付いています。
下記がそこに書かれた内容です。
この手順に従って366Mhz換装の写真を見ていただくとわかりやすいと思います。
Installation Instructions:
IBM ThinkPad 770E/ED 400MHZ Pentium II CPU Upgrade.
IBM ThinkPad 770E/ED 400MHZ Pentium II CPU upgrade installation kit
Warning:
The CPU module is sensitive to static electricity - please observe
standard ESD precautions and wear a grounded wrist strap for ESD
protection.
1. Install BIOS.
Check that the computer starts
normally with no error messages. Install the new BIOS with
Pentium II 400MHZ support by booting from the supplied diskette with
AC-power connected
and a fully charged battery installed. Follow the instructions on screen
to update the system
BIOS.
2.Remove existing CPU.
1. Disconnect AC-power and
remove any external accessories and PCMCIA cards.
2. Remove the battery, and the floppy or CD/DVD-ROM from the device bay.
3. Remove hard drive by removing the large retaining screw and cover and
sliding the drive
Outward,
4. Remove the keyboard retaining screws on the bottom of the unit (all
screws marked with
an arrow). When removing screws from the unit, carefully note the position
of each to
allow correct re-assembly. Use a sharp pointed object, such as a knife, to
carefully
remove the black self-adhesive screw covers without damage,
5. Carefully remove the keyboard/top cover assembly by sliding slightly
toward the front of
the computer to remove, and carefully disconnect the flexible keyboard
cables towards
the rear of the computer.
6. Remove the metal shield assembly by first removing all of the screws
holding it in place.
Be sure to note the position of the speaker cables/device-bay latch parts
at the front of
the shield assembly to allow correct reassembly.
7. Remove the video and DC-power board assemblies by first removing all of
the screws
holding them in place.
8. Remove the fan assembly from the CPU-module after removing the two
screws holding it
in place, and the three screws holding the CPU-module to the system board,
9. Remove the CPU-module by carefully lifting upward from the socket.
10. Unclip the lower heat sink from the CPU-module and install onto the
new CPU-module.
3. Install new CPU.
Install the new CPU into the socket, and reassemble the computer in reverse order of above.
4. Turn the comuter on and
test.
If installation was successful,
the computer will now power on normally, The built-in
diagnostics (accessed by holding down F1 while powering on) will correctly
identify the
computer as a Pentium II running at 400MHz.